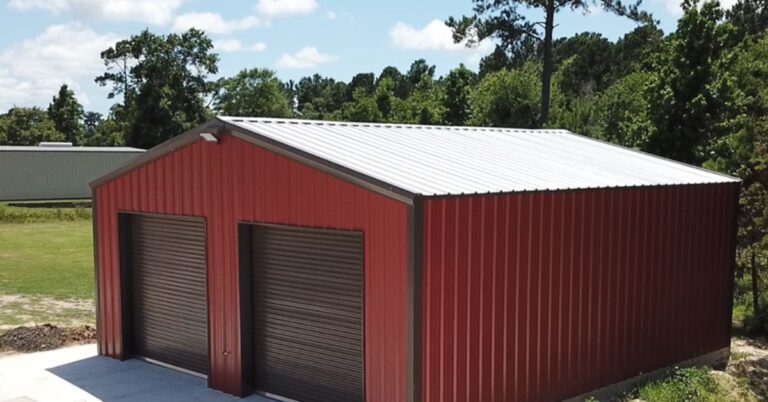
Red iron steel building kits are becoming increasingly popular across the United States for everything from garages and workshops to barns and commercial structures. Known for their durability, affordability, and quick installation, red iron steel buildings are a top choice for individuals and businesses looking to build strong, long-lasting structures without the high costs and lengthy timelines of traditional construction.
If you’re considering putting one up yourself or just curious about the process, this guide provides a step-by-step overview of how to assemble a red iron steel building kit.
Understanding What’s in a Red Iron Steel Building Kit
Before diving into the assembly process, it’s important to understand what’s typically included in a red iron steel building kit. These pre-engineered steel buildings come with pre-cut and pre-drilled steel components, including I-beams (which are often painted with a red oxide primer, hence the name “red iron”), wall and roof panels, purlins, girts, fasteners, anchor bolts, and sometimes insulation packages.
The kits are designed to be easy to assemble for contractors or skilled DIYers, but having a good understanding of the components and process can make a significant difference in the outcome.
Site Preparation and Permits
As with any construction project, proper planning starts with the foundation. A red iron steel building requires a flat, level site and a concrete foundation that meets the specifications of the steel building kit. Most manufacturers will provide engineered drawings that detail the size and placement of anchor bolts for your foundation.
Before pouring the concrete, it’s crucial to check local building codes and obtain any necessary permits. Working with your local municipality ensures that your red iron steel structure meets zoning and safety regulations. Preparing the site also involves clearing debris, ensuring good drainage, and providing access for heavy equipment.
Unloading and Organizing the Steel Building Components
Once the delivery of your red iron steel building kit arrives, it’s important to unload the components carefully and organize them by category. It’s a good idea to keep all structural steel, panels, and fasteners grouped separately to make the assembly process smoother. Most kits come with an erection manual, and following it closely will help you stay organized and avoid confusion.
Inspect the parts for damage and check the packing list to confirm everything was delivered. Missing or damaged parts can delay the project, so contacting the supplier immediately can save you time and money.
Installing the Anchor Bolts and Preparing the Foundation
The anchor bolts are critical because they hold the entire steel frame securely to the foundation. These bolts must be placed precisely according to the engineering drawings provided. Any errors in anchor bolt placement can cause major issues when it’s time to erect the steel frame.
After the anchor bolts are correctly installed and the concrete has fully cured, you’re ready to begin the actual steel building assembly.
Erecting the Steel Frame
The steel frame is the backbone of the entire structure, and its proper installation is crucial. This process usually starts with erecting the main I-beam columns. These heavy-duty columns are set into place and secured to the anchor bolts. Due to their weight, using a crane or forklift is often necessary to lift the beams safely.
Once the columns are secured, the horizontal I-beam rafters are installed to create the roof frame. This forms the primary structure of the building. Next, the secondary framing components like girts and purlins are added. These connect the main frame and provide support for the wall and roof panels.
The red iron construction system is engineered to be both strong and flexible. This makes it suitable for a wide range of building applications, including residential garages, commercial warehouses, and agricultural barns. The key to success in this phase is ensuring that all bolts are tightened properly and the structure is squared and plumb.
Installing Roof and Wall Panels
Once the steel skeleton of the building is in place, the next step is to install the roof and wall panels. These panels are typically made of high-quality, corrugated steel that is designed to withstand harsh weather conditions. The panels are attached using self-tapping screws and sealant to prevent water leaks.
Starting from one corner and working your way across helps maintain alignment. Roof panels should overlap properly to create a watertight seal. Some kits also include ridge caps, eave trims, and other finishing details that enhance both appearance and performance.
It’s essential to wear safety gear and secure yourself when working on the roof, as steel panels can be slippery and sharp.
Adding Doors, Windows, and Insulation
Depending on the design of your steel frame kit, you’ll likely have framed openings for doors and windows. These can be installed once the panels are up. Most red iron steel building kits allow for roll-up doors, walk-in doors, and sliding windows.
If your kit includes insulation, now is the time to install it. Common options include fiberglass rolls or rigid foam panels. Insulation not only helps regulate temperature inside the building but also improves energy efficiency and reduces condensation.
Electrical and Interior Finishes
While this step is optional and often done later, now is a good time to consider any electrical or HVAC installations. Since red iron steel buildings are used for many purposes, some may require lighting, power outlets, heating, or air conditioning. Working with licensed professionals ensures that these systems are safely and correctly installed.
Interior finishes, such as drywall or metal liner panels, can also be added depending on the building’s intended use.
Final Inspection and Clean-Up
Once assembly is complete, walk through the building and inspect every section. Check for loose fasteners, gaps, or areas that may need caulking or touch-up. This is also when you’ll complete any necessary inspections from local authorities to ensure the structure meets all building codes.
Clean up the site, dispose of any construction debris, and store leftover materials or touch-up paint for future maintenance needs.
Enjoy Your New Red Iron Steel Building
After all the hard work, it’s time to enjoy the benefits of your new red iron steel building. Whether it’s being used as a workshop, garage, storage space, or even a home office, these buildings are incredibly versatile and built to last for decades. Thanks to the strength of the red iron steel and the precision of pre-engineered design, your building will offer protection, durability, and peace of mind for years to come.
Final Thoughts
Assembling a red iron steel building kit may seem like a daunting task at first, but with the right planning and understanding of the process, it can be a rewarding experience. These pre-engineered steel buildings are a practical solution for anyone looking to build a structure quickly and affordably. From the solid steel frame to the durable roof and wall panels, every component is designed for strength, longevity, and ease of installation.
Whether you’re hiring a crew or taking the DIY approach, the key to success lies in proper site preparation, careful assembly, and attention to detail. Red iron steel building kits offer a modern and reliable construction method that continues to grow in popularity across America. With this guide in hand, you’re well on your way to completing your next steel building project with confidence.