Creating your own bong can be a fun and rewarding project. Whether you’re looking to save money or simply enjoy crafting, building a bong from scratch is a great way to customize your smoking experience. This guide will walk you through the process with simple DIY instructions, perfect for beginners.
TRENDING
JeinzMacias.com: Discover Innovative Solutions & Expertise
Understanding the Basics
What is a Bong?
A bong is a filtration device used to smoke substances like cannabis. It works by passing the smoke through water, which cools and filters it before inhalation. Bongs come in various designs and materials, but the fundamental principle remains the same.
Why Make Your Own Bong?
Building your own bong allows you to personalize its design, size, and materials to fit your preferences. It’s also a cost-effective alternative to purchasing a commercial bong. Plus, it can be a fun project that enhances your creativity.
Materials and Tools
Essential Materials
- Main Chamber: A large, sturdy container (e.g., plastic bottle, glass jar, or metal can).
- Downstem: A tube or pipe for the smoke to travel through.
- Bowl: A small, heat-resistant container for holding the substance.
- Sealant: Silicone or epoxy to ensure airtight seals.
- Rubber Grommets: For added sealing and stability.
- Water: To fill the chamber and cool the smoke.
Tools Required
- Drill or Craft Knife: For making holes in the main chamber.
- Scissors or Wire Cutters: To trim the downstem.
- Ruler: For precise measurements.
- Marker: To mark drilling spots.
- Sandpaper: To smooth rough edges.
Step-by-Step Instructions
Step 1: Prepare the Main Chamber
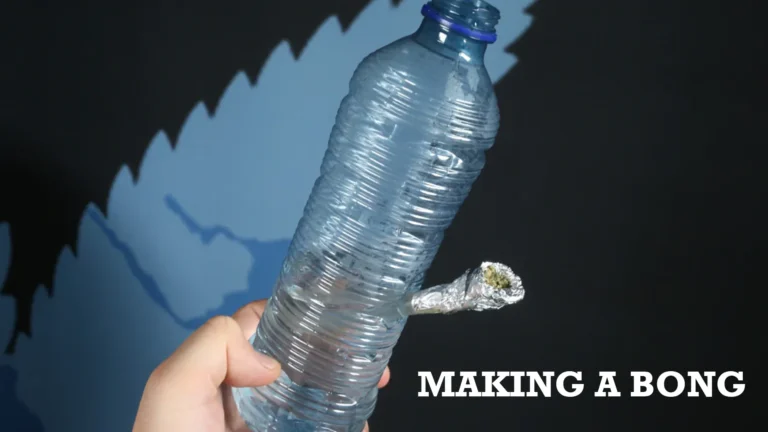
- Choose Your Container: Select a container that suits your desired bong size. Plastic bottles, glass jars, and metal cans are popular choices.
- Clean the Container: Ensure the container is thoroughly cleaned and free of any residue. This prevents contamination of your smoke.
- Mark the Drilling Spots: Using a marker, mark two spots on the container. One will be for the downstem, and the other for the air hole. The downstem hole should be about 1/3 of the way up from the bottom.
Step 2: Create Holes
- Drill or Cut the Holes: Carefully drill or cut the marked spots. The downstem hole should be slightly smaller than the downstem’s diameter to ensure a tight fit. The air hole should be just big enough for airflow.
- Smooth the Edges: Use sandpaper to smooth out any rough edges around the holes to avoid any potential injury or leaks.
Step 3: Install the Downstem
- Cut the Downstem: Measure and cut the downstem to the desired length. It should be long enough to reach the bottom of the container but not too long to interfere with the water.
- Attach the Downstem: Insert the downstem into the hole you drilled. Secure it with sealant or a rubber grommet to ensure it’s airtight.
Step 4: Attach the Bowl
- Prepare the Bowl: The bowl can be a small metal or glass container. If you’re using metal, make sure it’s heat-resistant.
- Secure the Bowl: Attach the bowl to the top of the downstem. You can use sealant or a rubber grommet to ensure a tight fit and prevent leaks.
Step 5: Add Water
- Fill the Chamber: Pour water into the container until it reaches just above the end of the downstem. This allows the smoke to pass through the water for filtration.
- Test for Leaks: Cover the holes with your hands and gently shake the container to check for leaks. If you find any, apply more sealant as needed.
Step 6: Final Touches
- Attach a Mouthpiece: If your container doesn’t have a built-in mouthpiece, you can create one by cutting a hole in the lid and attaching a small, flexible tube.
- Decorate Your Bong: Personalize your bong by decorating the exterior. Use waterproof paint or stickers to make it unique.
Using Your DIY Bong
How to Use It
- Pack the Bowl: Place your substance into the bowl.
- Light and Inhale: Light the substance and inhale through the mouthpiece while drawing the smoke through the water.
- Clear the Chamber: After inhaling, release the smoke by removing the bowl or opening the air hole.
Maintenance and Cleaning
- Empty and Rinse: After each use, empty the water and rinse the container with clean water.
- Deep Cleaning: For a thorough clean, use a mixture of water and mild soap, and scrub any residues.
Safety Tips
- Use Heat-Resistant Materials: Ensure all materials used are heat-resistant to avoid melting or burning.
- Handle with Care: Be cautious when drilling or cutting to avoid injury.
- Check for Leaks: Always ensure your bong is airtight before use.
Conclusion
Creating your own bong can be a rewarding DIY project. By following these simple instructions, you can build a functional and personalized bong suited to your needs. Whether you’re a beginner or an experienced crafter, this project is a great way to explore your creativity and save money. Remember to prioritize safety and maintenance to ensure a great smoking experience every time.
ALSO READ: Get In Touch On TurboGeek.org: Your Gateway To Tech Insights
FAQs
What is “making a bong”?
Making a bong involves crafting a homemade filtration device used for smoking substances like cannabis. It typically consists of a main chamber, a downstem, and a bowl. The process involves choosing materials, drilling or cutting holes, assembling parts, and ensuring airtight seals to create a functional and personalized smoking tool.
Why is it beneficial to build your own bong?
Building your own bong allows you to customize its design, size, and materials according to your preferences. It can be a cost-effective alternative to buying a commercial bong and offers a creative outlet. Plus, it gives you a sense of accomplishment and a unique piece tailored to your needs.
What materials are needed to create a bong?
Essential materials include a main chamber (like a plastic bottle or glass jar), a downstem (a tube or pipe), a bowl (a small heat-resistant container), sealant (silicone or epoxy), and rubber grommets. You’ll also need water for filtration and tools such as a drill or craft knife, scissors, a ruler, and sandpaper.
How do you ensure your DIY bong is airtight?
To ensure your bong is airtight, make sure the downstem and bowl are securely fitted into their respective holes. Use sealant or rubber grommets to fill any gaps. After assembling, test for leaks by covering the holes and gently shaking the bong to detect any air bubbles.
What are some safety tips for making and using a bong?
Use heat-resistant materials to prevent melting or burning. Be cautious when drilling or cutting to avoid injuries. Ensure all seals are airtight to prevent leaks. Regularly clean the bong to maintain hygiene and functionality, and avoid using damaged or cracked materials.